
We’re proud to be featured at two beautiful splash pads that can be enjoyed whenever passengers spend a Perfect Day® at CocoCay® courtesy of Royal Caribbean. Guests can cool off, run and play, or relax on the sidelines at both Splashaway Bay designed by Martin Aquatic Design & Engineering or at Captain Jill’s Galleon designed by the Life Floor Studio. These two projects at CocoCay are quintessential examples of Life Floor’s custom cutting technology and our ability to match any aquatic feature’s theming.
Splashaway Bay has a vibrant and whimsical underwater theme with bright inlays and shapes that match the graphic design of the play structure panels on the splash pad. This engaging design enhances play value by inspiring kids and families to create a variety of games hopping from color to color and shape to shape. The pairing of the surface design with this splash pad’s play structures and water features has easily made Splashaway Bay one of many focal points on the island. As a result, it has received recognition across the aquatics industry, including being named a 2019 AI Dream Design.
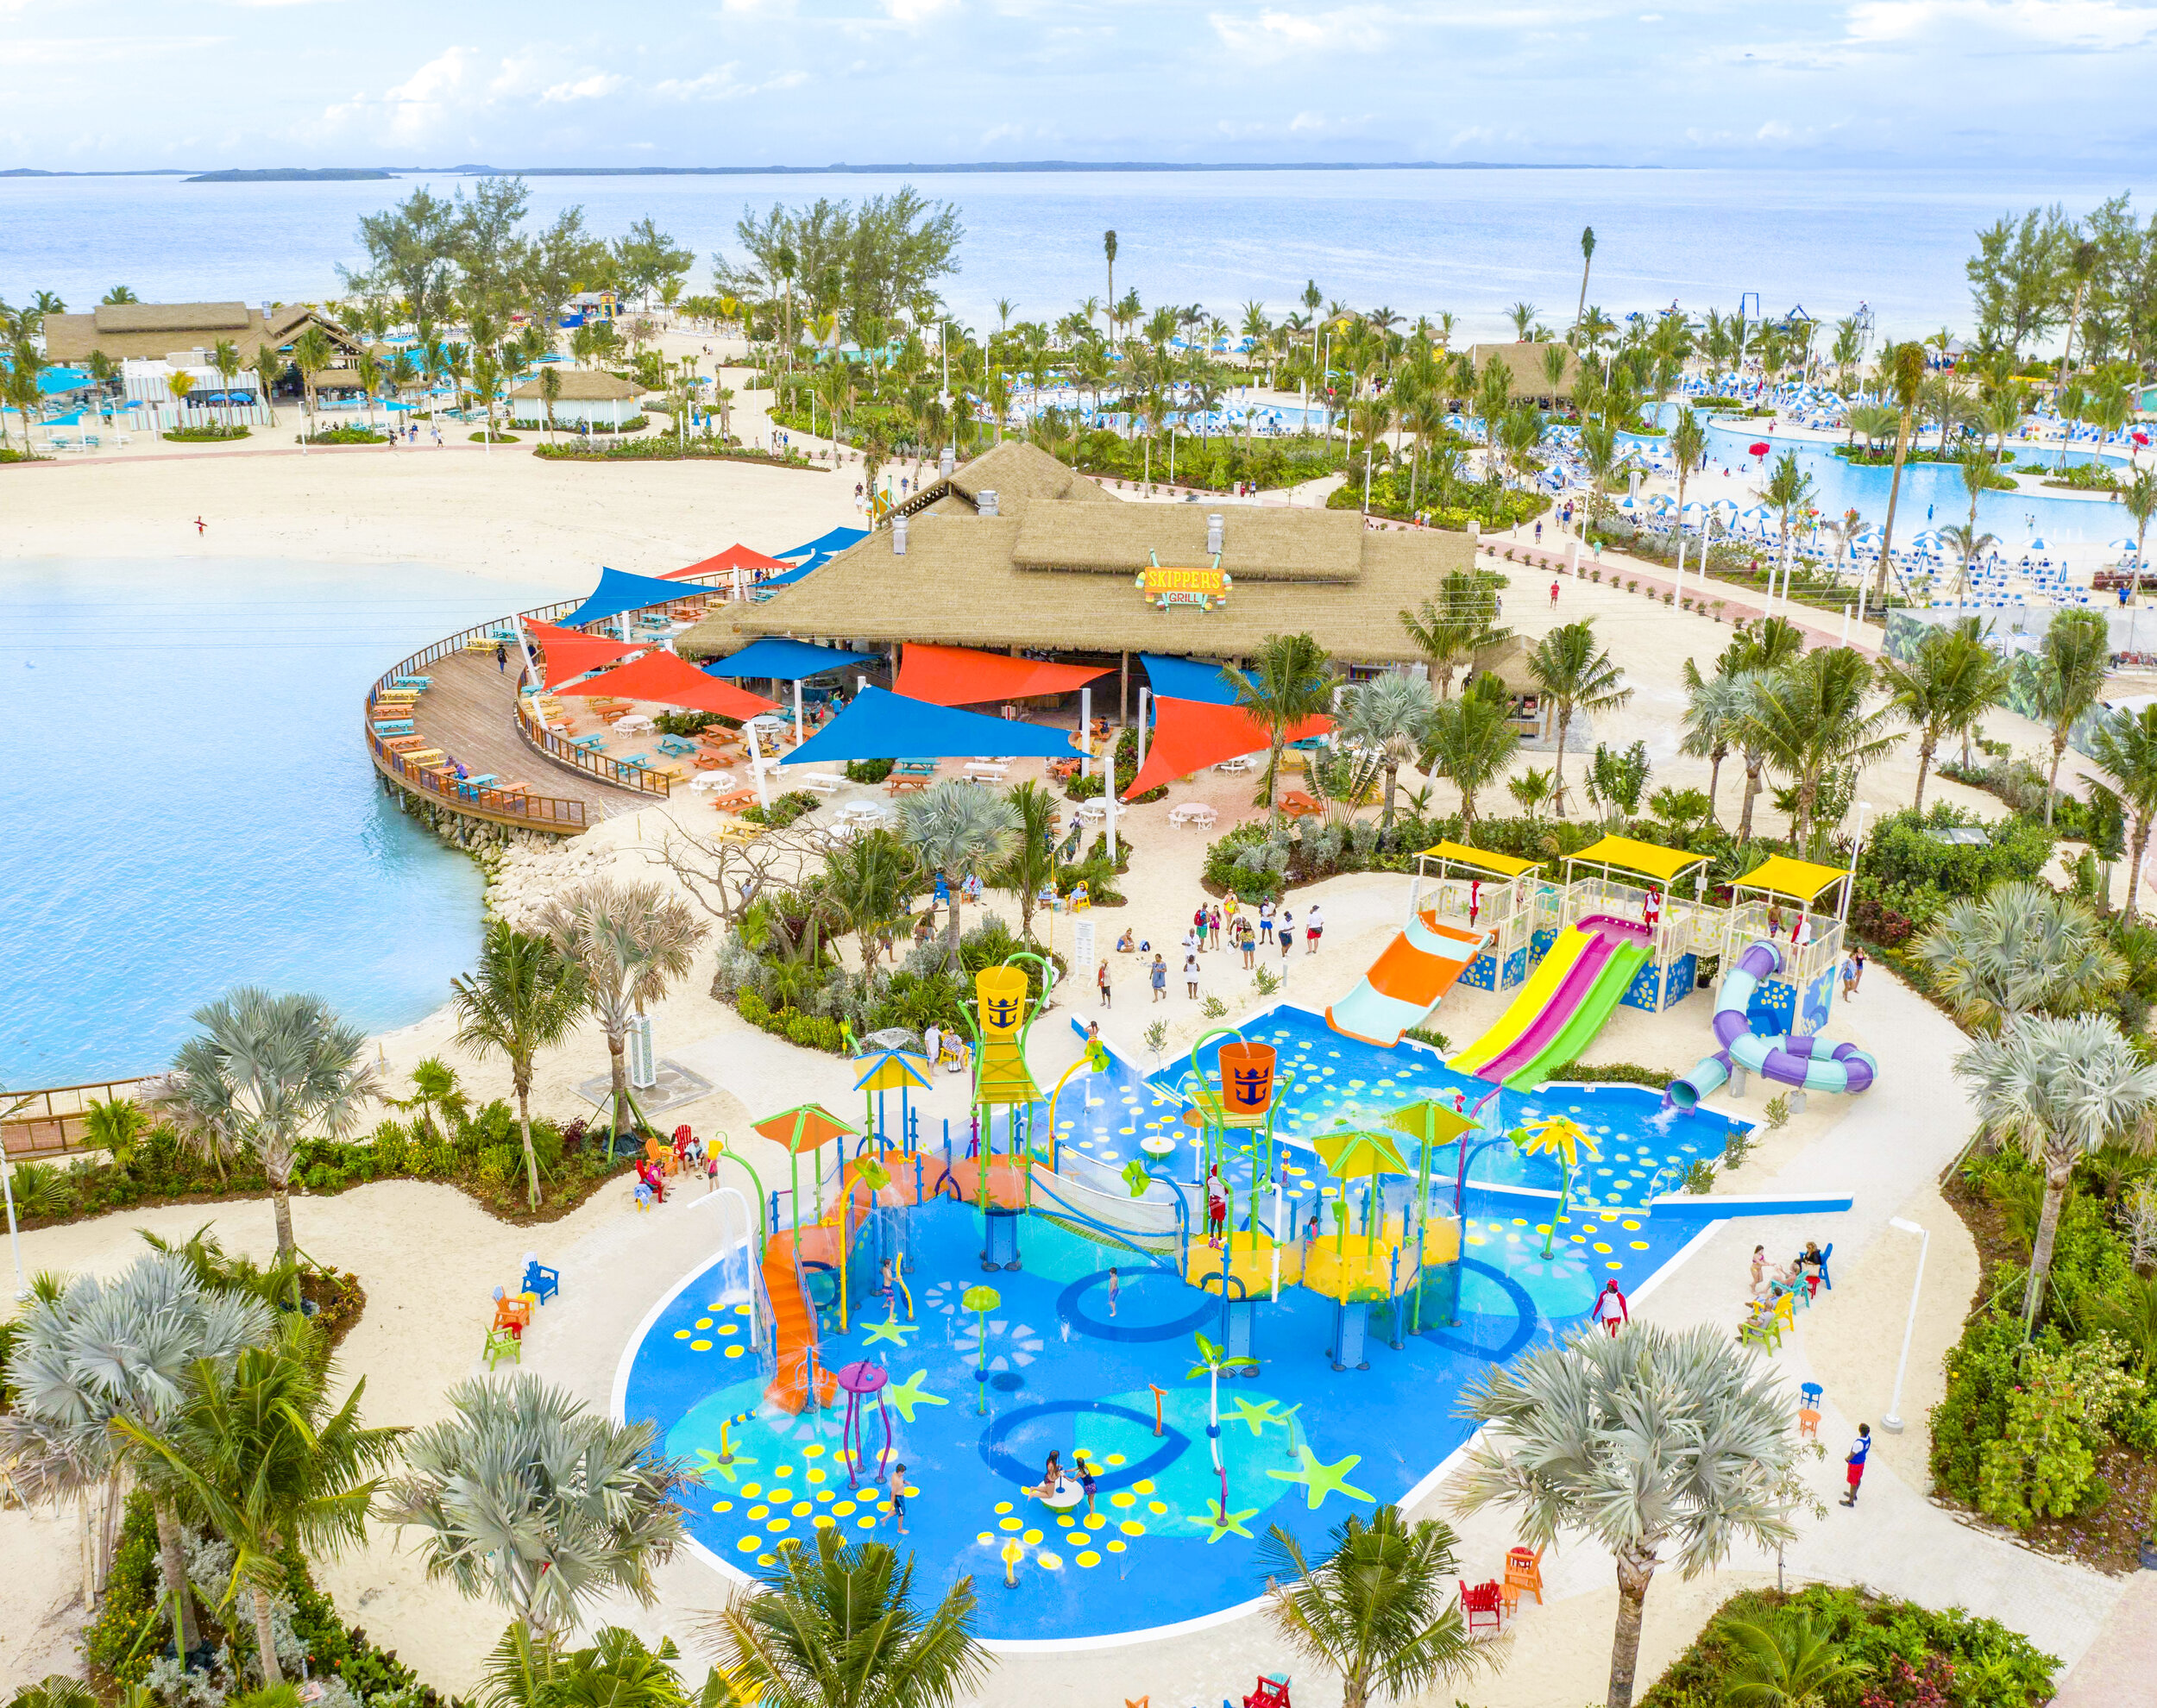
Image Credit: Royal Caribbean
At Captain Jill’s Galleon, Life Floor surrounds a pirate vessel in a wavy pattern designed to mimic the water and shore beneath the massive hull. Sandy “islands” feature water cannons for water play at the surface level. As children venture down porthole slides and engage with the splash features, they can easily imagine sailing the high seas with the vast expanse of the ocean surrounding the island on the horizon.
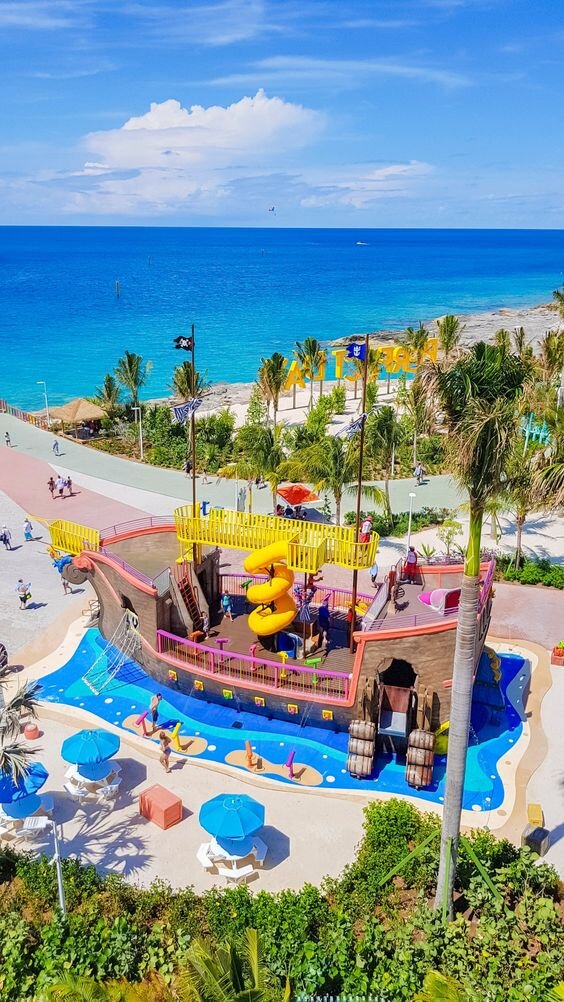
Image Credit: Royal Caribbean
Thank you to Royal Caribbean, Martin Aquatic Design & Engineering, WhiteWater West, and Inside Edge for collaborating with us to make the splash pads at this dream getaway a reality!